Bottom Lash Extensions - How To Tutorial
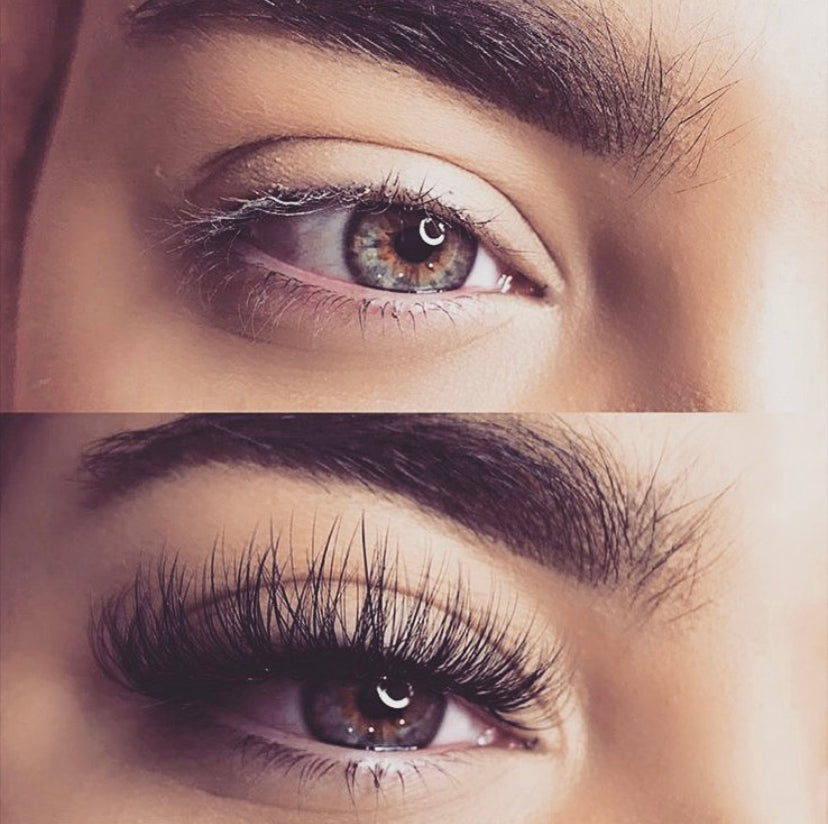
Adding extensions to bottom lashes is in trend. You’ll be amazed at how adding 15-20 lower lashes per eye greatly changes how the eye appears. Bottom lashes can make the eyes look bigger and more dramatic without looking fake.
Image credit: @poplashesbydiana

However, lower lash extensions aren’t always offered to clients to enhance their lash look. Why? Because it’s considered to be an advanced skill.
So, if you haven’t been trained on the technique yet, read this post and see if this is something you’d like to add to your service.
In this post, we will cover the following topics:
- Who should or should not get lower lash extensions
- How to apply bottom lash extensions (step-by-step guide)
- Mapping ideas for lower lash extensions
- How long it takes to do a set of bottom lashes
- How much you should charge
First, who should get lower lash extensions?
Lower lash extensions are suitable for everyone, but the following three types of clients will love this lash more than anyone:
Mascara-loving clients

Some clients just can’t give up those mascara pumped up lower lashes. Although we understand that urge, most mascaras are not lash-extension-friendly and they can damage the retention! Having lower lash extensions is an excellent choice for these clients because they prevent the risk of mascara debris clumping together with upper lash extensions.
Mega volume lash clients

Bottom lash extension is all about balancing out the top and bottom lashes. If your mega volume lash client thinks her lashes are a little too dramatic, adding lower lashes can easily balance the focal point and make her top lashes even better!
Bride-to-be clients

This is a huge plus for our bride clients who need to look good AND have a high chance of crying! Having bottom lash extensions can not only make them look extra special but also prevent those embarrassing raccoon eye moments.
Bottom lashes are NOT for these clients
Clients with natural lower lashes pointing straight up. Adding lower lash extensions to these lashes will interfere with their vision and cause discomfort. Offer them a lash lift instead.

Clients with too short, sparse lower lashes are not a good candidate for lower lash extension either. Retention will be very short, and lower lash extensions can overly accentuate their shortcomings.
Some clients might not have enough lower lashes for extension:

How to apply eyelash extensions to bottom lashes
Prepping
The first step is to pull up the upper lashes so that they don’t interfere with the lower lashes. We like using micropore tape for this job.

Layer two strips of tape, with the adhesive parts facing each other. Leave a little bit of the sticky side on the ends, like in the picture below (the pink marking on the image is where the two pieces of tape meet with the adhesive sides facing each other).

The reason we do this is because we don’t want to put anything too sticky on upper lash extensions. If you hold the upper lashes with tape with very strong adhesiveness, you could accidentally rip off the upper lash extensions when you remove the tape.
Some lash artists use eye pads to hold the upper lashes, but we do not recommend doing this. Using eye pads to lift up the upper lashes can create a blooming effect and affect retention if the moisturizing components of the gel eye pad touch the upper lash extensions.
Next is placing the eye pad. Placing the eye pad is going to be a little bit different since you’re doing bottom lashes. The lower lashes will be exposed, so place an eye pad underneath the bottom lashesfor application.
It will be the same placement but underneath the lash line so the bottom lashes sit on top of the eye pad.

Alternatively, you can also use tape or a soft patch (thinner, stretchier eye pad) under the bottom lashes if your client has very thick or prominent eye bags.
*Precaution 1. You must place something under the lower lashes.
Whether it’s an eye pad or tape, you must place something under the client’s lower eyes. When you work on the lower lashes, your sharp tweezer ends are going to be face down, and there is a high risk of poking the client's face. Always place something under the bag!
Don’t do this! Place something under the eye:

*Precaution 2. The eyes must be shut
We’ve seen some lash artists doing the lower lashes with their clients’ eyes open. Why? Because it’s easier! But it’s a big no-no. This way, clients’ eyes are exposed to glue fumes that can cause them irritation and potential glue allergy.
Don’t do this! Close the eyes:

Prime the bottom lashes
Bottom lashes get affected more easily by our facial oil as they touch our face more directly than upper lashes do. Use a lash primer to prime the lower lashes. The priming procedure is the same as for upper lashes.

Which lashes to use?
Curl-wise, generally speaking, bottom lashes should be less curly than the top lashes to stay looking natural. So, a J or B curl should do the trick for the bottom lashes.
Soft J curl lashes:

The best thickness to use is 0.10 - 0.15mm for a classic lower lash set, depending on the client’s natural lash condition. You can also apply multiple lashes (2-3) per one bottom lash for a lower lash volume set.
The best length for bottom lash extension is somewhere between 5-7mm. If lashes are too long, they can look too exaggerated.
At BL, we offer four thicknesses of bottom lashes, 0.07, 0.10, 0.15, and 0.20mm in J, B, C, and D curls. Each tray consists of 12 rows (four rows of 5mm lashes, four rows of 6mm lashes, and four rows of 7mm lashes) of the softest mink lashes.

But if your client’s facial shape requires a longer length than 7mm, you can also use normal mink lashes.
How to apply eyelash extensions to bottom lashes
When picking up a lower lash, what you want to do is place them the opposite way (upside down) to how you would apply the top lashes.
To make your job easy, place the lash strip upside down like this:

For bottom lash application, we want the tip of the lash curl facing downwards towards the skin. So, when you pick up a lash from the strip, it should look like this:


Do the whole set as you’d do the upper lash extension - always shorter in the inner corners.


*Precautions: don’t forget the isolation
Because bottom lashes are more sparse than top lashes, it’s tempting to not isolate them and apply the lash directly. However, you must isolate the bottom lashes! Otherwise, they can all stick together and make a huge mess.
Don’t do this!

How to remove the bottom lashes
The process of bottom lash removal is the same as with upper lashes. However, take extra care to make sure the remover doesn’t get into the eyes.
We recommend using thicker texture remover like Cream Remover Double Plus for bottom lash removal.


Tweezer & glue recommendations for bottom lash application
For isolation, curved tip tweezers like BL All-in-one are much easier to use for a bottom lash set.
For pickup and placement, curved tip tweezers like RV-Curve would be easy on the grip, or some might prefer straight tweezers like 2-SA to get a better angle for the placement.

Use a lash extension glue with thin viscosity like Mach (1-2 second drying time) or Ultra plus glue (3-4 second drying time).

Why? Unlike upper lash extensions, the roots of bottom extensions are much more visible, and thicker viscosity glue will make the set look untidy.
For the same reason, do not use too much glue when you do the bottom lashes.
Mapping ideas for lower lash extensions
You can use different lengths of lash extension for the whole set of lower lash extensions. You can achieve a staggered look or you can have a uniform look - it really depends on what your client wants.
Classic vs Volume lash extension on the bottom lash:

How long do bottom lash extensions last?
One downside of the bottom lash extension is its durability.
Unlike a set of upper lash extensions, bottom lash extensions can only last 1-2 weeks.
Unfortunately, when clients rub their eyes, bottom lashes tend to be the first ones to go! Due to their relatively short lifespan, some lash artists don’t even perform fills for bottom lashes, but instead, simply re-apply new lashes when clients return.
You need to make your clients aware of this retention issue before the application.
Image credit: @yurika_lashesldn

How long does it take to do this?
Since there are fewer lashes on the bottom eyelashes, the average application time for bottom lashes is under 30 minutes. It is much less time compared to upper eyelash extensions!
Once you’ve mastered the skill, this is a great add-on service to an already existing client as they can now request bottom lashes within their usual upper lash appointment without necessarily adding much more time.
How much do I charge for the bottom lash service?
You can either charge per lash, $2-3 per lash, or charge somewhere between $25-50 per set. Bottom lashes are an excellent opportunity for lash stylists to offer a new service to clients.
Image credit: @lashcomissoula

Ready to try out your first set with the best quality bottom lashes? Get a tray of BL bottom lash extensions with an up to 50% discount with a BL Pro Account.
Read more about lash extensions here:
Eyelash extension techniques for monolid eyes
How to choose premade lash fans
A complete guide to eyelash extension curls, thicknesses, and lengths


